
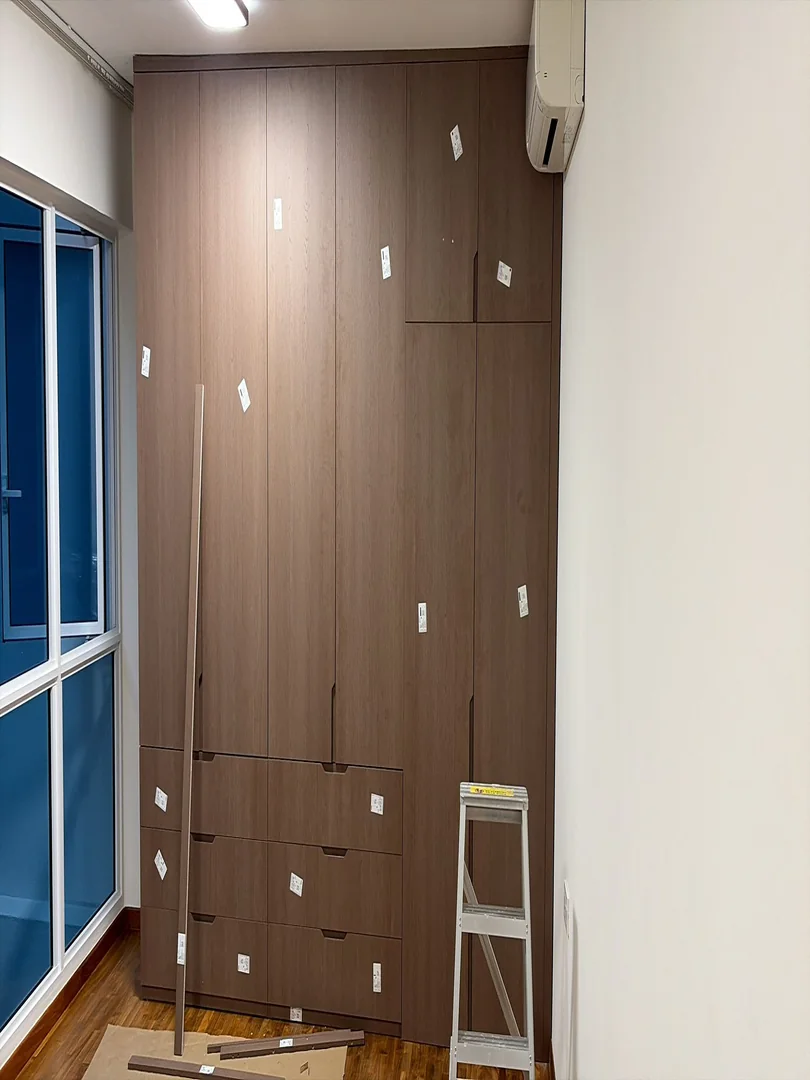
Confirm the Final Site Measurement
A built-in wardrobe should be produced from confirmed site dimensions, not only the HDB floor plan or an early renovation drawing. The installer needs the finished wall-to-wall width, ceiling height, floor level, skirting, beams, window ledges and any uneven corners. If plastering, tiling or flooring has changed since measurement, tell the furniture supplier before fabrication continues.
Review the wardrobe elevation with dimensions for each door, drawer and upper cabinet. Confirm which side meets the wall and whether filler panels are needed for doors to open without hitting curtains, switches or adjacent furniture. Check the proposed wardrobe depth against the bed position and walking aisle by marking it on the floor.
Final approval should record the laminate, internal finish, handle or profile, hinges, drawer runners, clothes rails and shelf arrangement. Verbal descriptions such as brown wood or soft-close are not precise enough. Keep one approved drawing and finish schedule so the homeowner, designer and installer refer to the same version.
- Measure after relevant finishes are complete
- Mark wardrobe depth beside the bed
- Approve one dated drawing and finish schedule
Check Windows, Curtains and Air-Conditioning
Wardrobes often use the full height beside a window or air-conditioning unit. Confirm that doors do not block the window handle, curtain track or access for cleaning. Leave practical room to remove curtains and service window hardware. A deep cabinet return can also reduce daylight or make a narrow gap that is difficult to maintain.
Air-conditioning airflow, drainage, electrical isolators and service access must remain workable. Do not allow the wardrobe to cover an access point or prevent the unit from being opened for maintenance. Ask the air-conditioning contractor and furniture supplier to coordinate clearances when the cabinet sits close to the indoor unit or piping.
- Open windows and wardrobe doors on the plan
- Protect air-con service access
- Keep curtain tracks removable
Coordinate Flooring, Skirting and Painting
Agree on the renovation sequence before the installation date. Whether the wardrobe sits on the structural floor, finished flooring or another prepared base depends on the cabinet design and flooring system. Floating floors should not be trapped under fixed cabinets unless the flooring instructions permit it. If vinyl is installed first, protect it from cutting debris and heavy panels.
Decide how existing skirting will stop at the wardrobe sides and whether wall paint must be completed behind or around the unit. The installer may need to scribe fillers to uneven walls. Painting immediately after installation can mark laminate or hardware, so identify touch-up responsibilities and protection materials in advance.
- Confirm flooring and carpentry sequence
- Show skirting termination on the drawing
- Assign wall touch-up responsibility
Prepare the Room and Building Access
Clear clothing, loose furniture and fragile items before delivery. Provide enough working space for panels, tools and ladders. Beds that remain in the room may need dismantling or shifting; agree who performs this work and where items will be stored. Cover retained flooring and nearby furniture with appropriate protection without creating a trip hazard.
For an HDB or condo, confirm permitted working hours, lift booking, loading access and protection requirements. Measure the lift and corridor route if panels are unusually long. The quotation should state whether delivery, local installation, debris removal and access protection are included. Inform the installer about parking or security procedures before the team arrives.
- Empty the installation wall and aisle
- Book lift and protection where required
- Check the delivery route for tall panels
Know What Happens During Installation
The team normally positions carcasses or panels, levels the unit, joins sections, fixes required components, installs doors and drawers, then adjusts alignment. Some cutting or scribing may happen on site. Keep children and pets away from the work zone and avoid using the room until the installer confirms that tools, fixings and debris have been cleared.
Site walls and floors are rarely perfectly straight, so small fillers, shadow gaps or scribed edges may be necessary. Ask before requesting last-minute layout changes, because altered shelf positions, extra sockets or a different door arrangement may not be possible after production. Record any agreed variation, added cost and revised completion timing.
- Keep the work zone clear
- Expect adjustment for uneven surfaces
- Record variations before work continues
Inspect Doors, Drawers and Interior Storage
After installation, open every wardrobe door fully and check the gaps, alignment and closing action. Test each drawer with the adjacent door open and closed. Confirm that internal drawers clear hinges and handles, clothes rails are secure, adjustable shelves have their supports and upper compartments match the approved drawing.
Inspect laminate faces, exposed edges, joints and filler panels under normal room lighting. Minor dust or removable labels are different from damage, so clean gently before deciding. Check that the wardrobe is stable and that no socket, air-con access point or window control has become inaccessible. Photograph any issue and agree on a rectification list before final sign-off.
- Operate every door and drawer
- Compare interiors with the approved drawing
- Create one written rectification list
Review Cost, Lead Time and Exclusions
Wardrobe price is affected by width, height, depth, door type, internal drawers, shelves, hardware, material finish, difficult access and installation details. Electrical relocation, air-con work, wall repair, painting, floor protection or furniture moving may be separate. Compare complete written scope rather than only a per-foot cabinet price.
The process usually includes quotation, site measurement, drawing revision, finish approval, production, delivery, installation and any agreed rectification. Custom furniture may require around six weeks after final confirmation, subject to factory schedule, shipping and complexity. Do not schedule movers or bedroom use too tightly around the first installation day; allow time for final adjustment if needed.
- Compare the same wardrobe specification
- List excluded trade work
- Allow time for final adjustment
FAQ and What to Send for a Quote
Should flooring be installed before the wardrobe? It depends on both systems, so the flooring and furniture suppliers should confirm the sequence. Must the room be empty? The installation wall and working route should be clear; discuss any bed or heavy furniture in advance. Can the wardrobe cover an air-con pipe box? Only after service access and condensation risks are assessed with the relevant trade.
Send the HDB floor plan, bedroom measurements, wide wall photos, window and air-con positions, bed size, flooring type, skirting details, storage requirements, preferred door style and renovation schedule. Include building access restrictions and anything that must remain in the room. WhatsApp Glee Deco & Furniture at +65 8742 6767 for a project-specific wardrobe quotation.
- Send window and air-con photos
- Include bed and flooring details
- WhatsApp +65 8742 6767 for a quote