
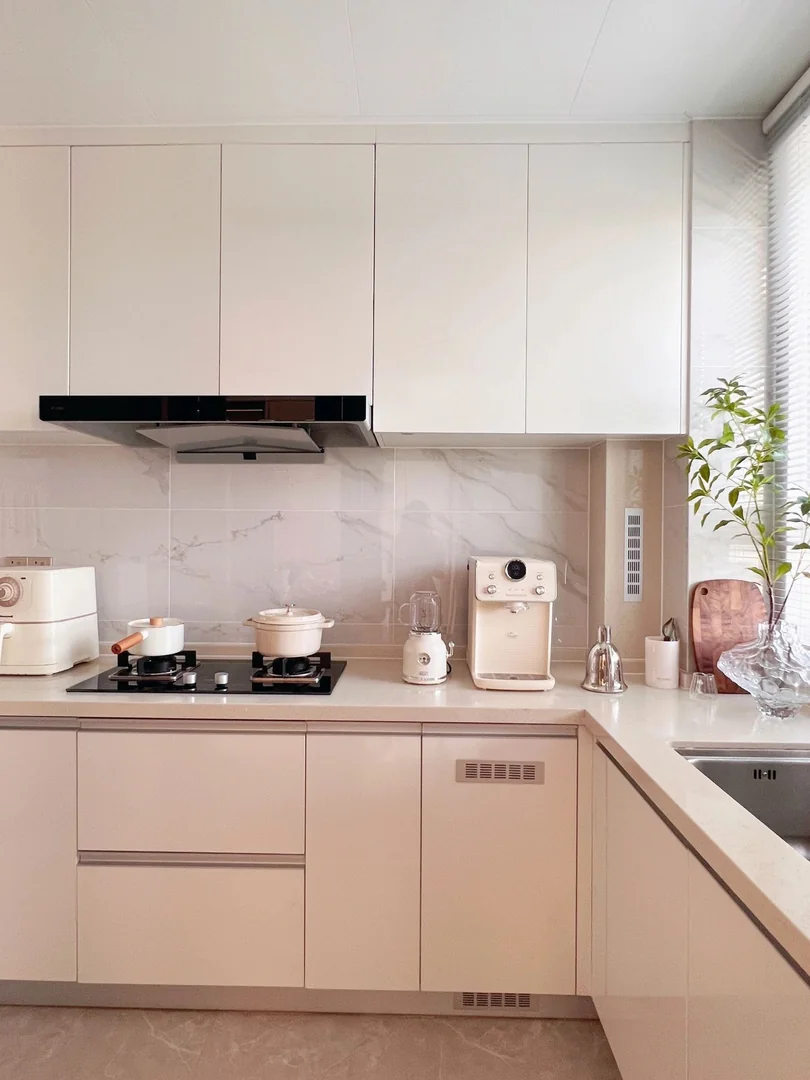
Start With the Fixed Kitchen Conditions
Cabinet, worktop and backsplash colours should be selected inside the actual kitchen rather than as three separate catalogue choices. Record the floor tone, wall colour, window direction, ceiling lights, appliance finishes and whether the kitchen is open to the dining room. These fixed conditions change how white, beige, grey and wood samples appear throughout the day.
In a compact HDB or BTO kitchen, several strong patterns can make the room feel busy. Decide which surface should carry the visual feature and let the other finishes support it. A patterned backsplash may suit simpler cabinet doors and a quieter worktop, while a strong wood cabinet may need a more restrained wall surface.
Make a simple site palette before approval: place the cabinet sample vertically, the worktop sample horizontally and the backsplash sample behind them. Add a photo or finish sample for the floor, appliance and handle. View the group from the kitchen entrance and dining area in daylight and after the ceiling lights are switched on. Label every approved code and take a reference photo. This does not replace supplier samples or drawings, but it helps the homeowner and contractor discuss the same combination and reduces decisions based on memory.
- Photograph the kitchen in daylight and at night
- List fixed floor and appliance colours
- Choose one main visual feature
Compare Cabinet Colours at Full Door Size
A small laminate chip does not show how a finish will look across tall cabinets and long overhead runs. View the largest practical sample and hold it vertically under the room lighting. Warm whites can sit comfortably beside beige stone, while cool whites may suit grey surfaces, but the undertone matters more than the colour name printed in a catalogue.
Consider fingerprints, edge lines and cleaning expectations. Very dark matte doors may show pale dust or oily marks, while glossy surfaces can reflect windows and ceiling lights. Wood grain direction should be agreed before production, especially where tall units meet drawers. Record the laminate code and door finish in the approved drawing and quotation.
- Check undertones under actual lighting
- Review fingerprints and reflections
- Record laminate codes and grain direction
Choose the Worktop for Use, Not Colour Alone
The worktop carries preparation, small appliances, heat-adjacent activity and cleaning. Compare the material's care guidance, available slab or sheet size, edge options, thickness and fabrication limits before deciding on appearance. No surface should be described as completely maintenance-free, stain-proof or indestructible without product-specific evidence.
Light worktops can brighten a narrow kitchen, but very uniform pale surfaces may show certain marks. Dark surfaces create contrast yet can make crumbs, water spots or fine scratches more noticeable. Look at a physical sample beside the cabinet front and floor. Ask where joints may occur, especially around corners, long runs, sinks and access constraints.
- Compare care guidance and fabrication limits
- Ask where visible joints may occur
- Check the sample beside cabinets and flooring
Plan the Backsplash Around Cleaning and Fittings
A backsplash protects the wall behind the sink, hob and preparation zones, but its joints and surface texture affect cleaning. Large-format panels may reduce grout lines, while tiles provide many patterns and sizes. Marble-look designs vary from subtle to dramatic, so confirm how veins continue or stop around corners, windows, cooker hoods and sockets.
Coordinate backsplash thickness with worktop upstands, socket boxes, window ledges and cabinet depth. Existing services may need adjustment by the appropriate trade. If glass, stone, tile or another specialist surface is supplied separately from the cabinets, clarify who measures, prepares the wall, seals edges and returns for final installation.
- Review joints around hob and sink zones
- Coordinate sockets and window ledges
- Assign measurement and sealing responsibilities
Use Lighting to Test the Complete Palette
Warm, neutral and cool lighting can shift the apparent colour of white cabinets and stone patterns. Test the three finish samples together under the proposed ceiling and under-cabinet lighting. A palette that looks balanced in a bright showroom may turn yellow, blue or flat in the completed kitchen if the light source differs.
Under-cabinet strips should provide useful task light without exposing bright dots in glossy surfaces. Agree on colour temperature, diffuser, switching, cable concealment and driver access before cabinet production. Drivers should remain serviceable. Avoid using decorative lighting to compensate for an impractical worktop layout or shadow from poorly positioned cabinets.
- Test all finishes under one light source
- Specify strip and diffuser positions
- Keep lighting components serviceable
Coordinate Appliances, Sink and Cabinet Details
Black, stainless-steel and white appliances add another large colour block. Confirm the exact fridge, oven, hob, hood, dishwasher and small appliances before finalising the palette. Repeating one appliance tone in handles, profiles or a narrow detail can create consistency, but every element does not need to match exactly.
Sink and tap finishes also affect the worktop cut-out and surrounding visual balance. Check undermount or top-mount requirements with the selected worktop and supplier. Cabinet handles, recessed pulls, toe kicks and ventilation grilles should appear on the final elevation. Small dark details can look deliberate when repeated, but random mixed metals may feel unresolved.
- Confirm exact appliance finishes and dimensions
- Match sink details to worktop requirements
- Show handles and grilles on elevations
Understand Cost, Ordering and Installation Sequence
Price is affected by cabinet dimensions, door finish, internal storage, hardware, worktop material, backsplash type, cut-outs, joints, special edges, lighting and site access. Electrical, plumbing, gas, demolition and wall preparation may be separate. Compare quotations using the same materials, dimensions and trade responsibilities rather than a single cabinet rate.
The normal process includes design, site measurement, appliance confirmation, sample approval, cabinet fabrication, installation, worktop templating or fitting where applicable, and backsplash completion. The exact sequence depends on the selected materials. Late changes to sinks, hobs, sockets or surface thickness can delay connected trades, so approvals should be recorded before production.
- Compare complete material and trade scope
- Approve samples before fabrication
- Coordinate worktop and backsplash sequencing
FAQ and What to Send for a Kitchen Quote
Must the worktop and backsplash match? No. They can coordinate through undertone, pattern scale or contrast without being identical. Are white cabinets difficult to maintain? Maintenance depends on the exact finish, use and cleaning method, so review samples and supplier guidance. Can final colours be chosen from photos? Photos help communicate direction, but physical samples should be checked at the site.
Send the floor plan, wide kitchen photos, appliance models, preferred cabinet colours, worktop and backsplash references, existing floor colour, service points and required trade scope. Mark anything to retain and your target renovation schedule. Glee Deco & Furniture can then discuss a coordinated kitchen cabinet quotation. WhatsApp +65 8742 6767 with the plan and photos.
- Send photos showing floor and lighting
- Include appliance and sink references
- WhatsApp +65 8742 6767 for a quote